3 Important Drone Rules to Know Before Flying a Drone

DJI Mavic Mini 249 gram

#1 Drone rules about registering and flight certificates

A drone that is heavier than 250 grams

If your drone is heavier than 250 grams, you must register with the RDW. After registering, you will receive a unique operator number that you must place visibly with a plate or sticker on your drone. Your operator number ends up in the European database, so you are able to fly within Europe.

If your drone is heavier than 250 grams, you also need a flight certificate. You can get this flight certificate by participating in a theory course in the form of an online test or by following a classroom lesson. When you pass this theory course, you will receive your flight certificate. If you don’t have a flight certificate and you are going to fly anyway, then you are punishable by law.

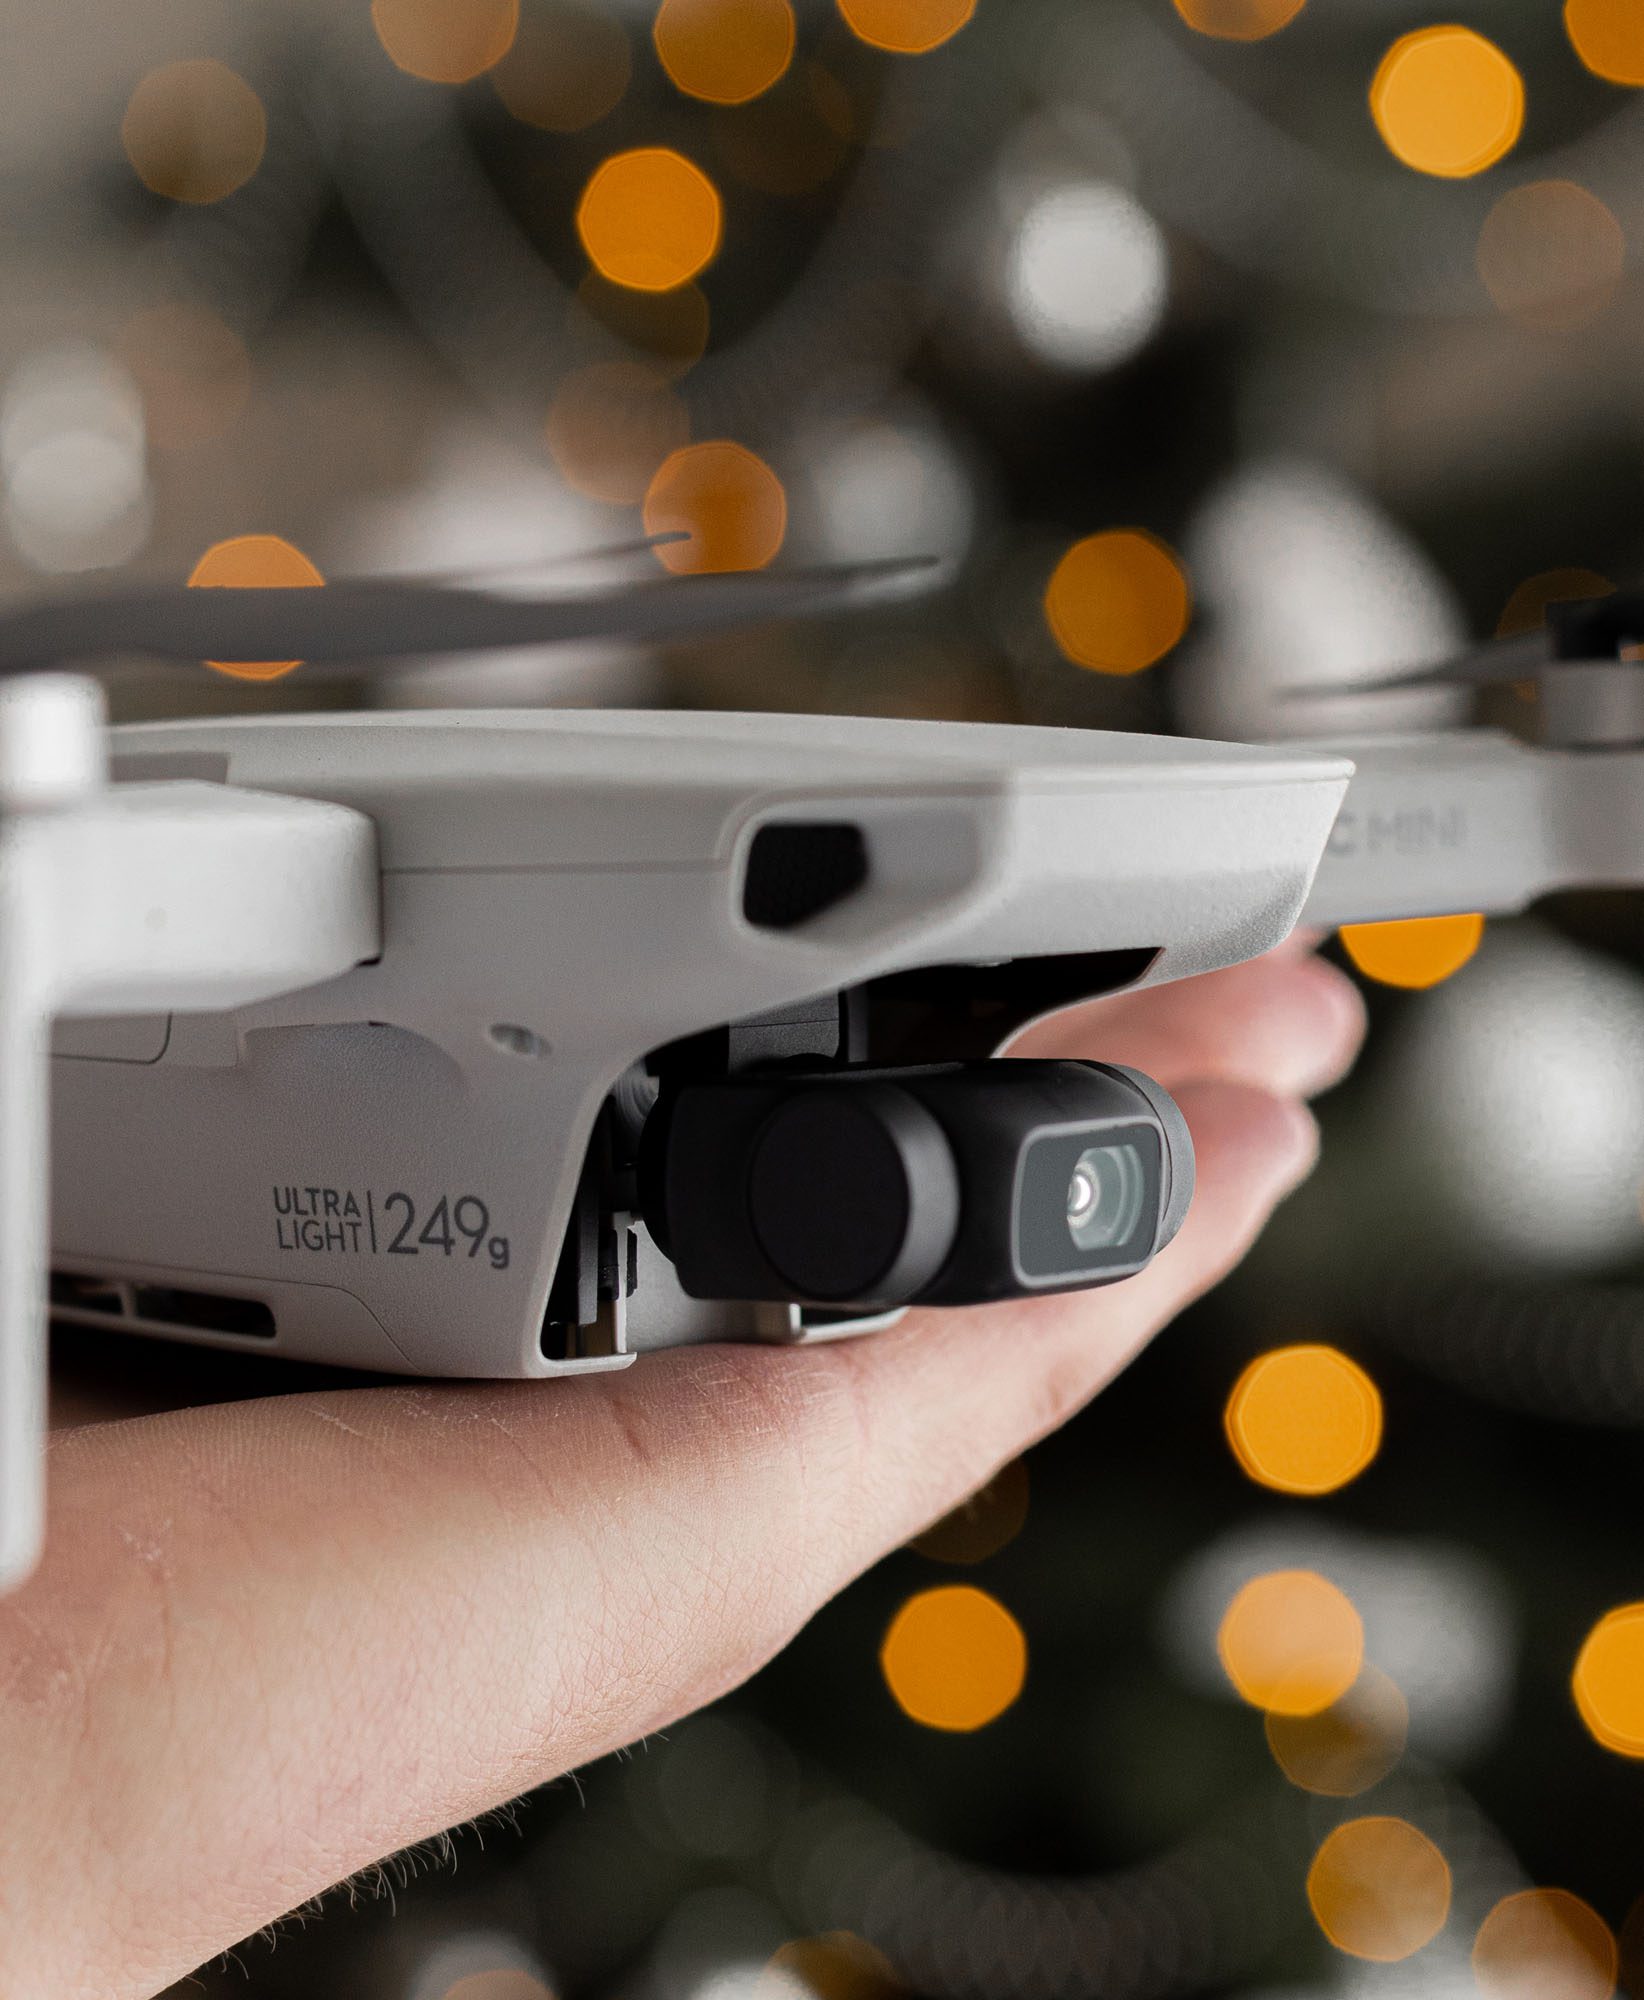
A drone that weighs less than 250 grams

Don’t you have a drone yet because you don’t want to put in so much effort to be able to fly? Then think of buying a DJI Mavic Mini or DJI Mavic Mini 2. These drones weigh less than 250 grams, so you don’t need to get a flight certificate. You can fly directly with these drones.

Tip: If you are insecure about flying a drone, want to learn more about the rules and how to control a drone, then we definitely recommend to follow the basic course category A1. You can follow this course at several organizations, such as: Droneflight Academy or Dutch Drone Academy.

#2 Drone rules per country

The regulations regarding drone flying differs per country.

Drone rules for the flying height

Take into account the maximum flight height. For example, in France you can fly 150 meters high, while in Germany you can only go up to 100 meters. Tip: While flying, you can see your flight altitude in the DJI Fly app. Preset the maximum flight altitude that is legal in the country you are flying in, so you don’t have to keep an eye on whether you are flying too high. Keep in mind that you always need to have your drone in sight.

Drone rules for the weight of drones

It differs per country how heavy your drone can be. For example, in Austria you can fly a drone as long as it is not heavier than 2 kilos and in Italy a drone may weigh a maximum of 25 kilos. Most hobby pilots will have a drone under 2 kilos, so you probably don’t have to worry.

#3 Drone rules in Fly and No Fly Zones

Before you want to take off, you have to check if it is legal to fly. With the DJI Fly App you can see where you can and cannot fly. When you open the map, blue and red areas will appear where you are not allowed to fly. If you accidentally get close to these areas, your drone will not crash, but the drone cannot fly any further. Usually these are zones near an airport, military base or national park.

Important: The DJI Fly app doesn’t show you every No Fly Zone. Most of the countries have their own drone fly app, the maps in these apps are stricter and correct. To fly in The Netherlands, you must check the GoDrone app before flying.

Flying outside The Netherlands

If you are traveling outside The Netherlands then you should download the apps of the countries you are flying in, so that you are prepared on the road and are not suddenly faced with surprises at your destination. In some cities flying is prohibited at all, such as in Rome. In some countries, drones are even completely banned, such as in Morocco, then your drone will actually be confiscated at customs.

Respect the privacy of the locals

In some areas it may be legal to fly, but the locals don’t appreciate it when you fly your drone. Because drones can cause nuisance and invade privacy, you will find signs in some specific areas stating that you are not allowed to fly your drone. Let’s respect those wishes.

It’s time to fly

Now that you know the most important rules for flying a drone, you can fly responsibly and safely. But flying a drone is not as easy as it seems. Want to get the most out of your drone and create dreamy and awesome content? Then read our blogs: Manually Set Your Drone – Tips To Get Beautiful & Smooth Shots or 6 Tips for Flying a Drone Carefree – Our Do’s & Don’ts.

6 Tips for Flying a Drone Carefree – Our Do’s & Don’ts

Mavic mini fly more combo

Sidenote before flying a drone

Before we will talk about the do’s and don’ts of flying a drone, we hope you know how to fly responsibly and safely. Would you like to know more about the rules and legislation regarding flying your drone? Then read our blog ‘3 Important Drone Rules to Know Before Flying a Drone

#1 Flying a drone inside is a NO GO

The first thing that comes to mind is: please don’t fly inside and fly very carefully if necessary. When we took our drone out of the box, we immediately wanted to try it out. But at home, the drone usually has no GPS signal due to the different layers in the house. This allows the drone to drift in the air and is less controllable. Our drone flew straight into a wall. Also, we had not attached the supplied inner protection to the drone, but luckily the drone had no damage.

#2 Look around before flying a drone

If you want to take off outside, it is important that you choose a good spot. First of all, find a place with a lot of space, such as a wide field. Follow the steps of the DJI Fly App and let the drone take off from an object. We use the box from the Fly More Combo as a platform. This way the propellers do not touch the ground and cannot be damaged. Tip: Always check the propellers beforehand to make sure they are all intact. If you decide to take off, first check that there are no trees, branches or power lines in the area you can fly into. And keep checking this continuously while flying.

#3 Choose a good ‘Return to home’ spot

Don’t panic if you lost sight of your drone at some point and don’t know how to get back. You can always use the ‘return to home’ button on your remote control to return your drone to the spot where you started the flight. Therefore, choose a suitable place where the drone can easily land or return to. The return to home button works even if the app loses connection to the drone. Once we flew near a village and the drone disconnected, we pressed the return to home button and the drone came back perfectly.

Tip: You can set the altitude at which the drone will fly back. Make sure not to let it fly back too low, because the drone will fly back in a straight line without paying attention to obstacles. Too high, on the other hand, is also not useful; the drone will have to take a long time to get to the correct, unnecessary height first. So explore the neighborhood and make sure you set the correct flight height.

Flying a drone

#4 Try to start from a 0 point

Always try to launch the drone from a 0 point. One time we launch the drone when we were on a hill and then wanted to fly to the salt lakes below us. The app indicated that we were flying at -50 meters. This is confusing and you can no longer estimate when you are near the ground (in this case the water). To see if we could fly a little lower, we had to point the camera down. At one point it was hard to see and of course we didn’t want to risk the drone falling into the water, so we had to fly back.

#5 Check the weather conditions

If it is windy outside, but you still want to fly your drone don’t let your drone take off too high at first and test whether the drone can handle the weather conditions. A drone can only handle a certain wind force, otherwise there is a chance that your drone will be blown away and you may never find it again. Some drones are stronger than others, so keep that in mind. For example, the DJI Mavic Mini can reach 46 KM/H and the DJI Mavic Air 2 72 KM/H. We have flown in high winds. First we flew with the wind and our drone went really fast! On the way back, however, the drone had a lot of trouble and was moving about 2 meters per second. That is quite slow when you are 250 meters away. At such a time, try to fly as low as possible so that the drone catches less wind.

Tip: With several apps, such as UAV Forecast, you can check the weather conditions and see if it is possible to fly.

#6 Return back after the ‘low battery’ warning

You are completely in your element and you take all the shots you could only dream of! But then the notification ‘low battery’ appears. Make sure you always fly back if you get such a notification. If you are far away, the battery drains pretty quickly and especially when it’s windy, the drone can’t return in time.

Tip: If you want to start flying again after the ‘low battery’ notification, buy the DJI drone with the Fly More Combo. This package includes extra propellers, 2 extra batteries, a charger in which all 3 batteries can be charged + a box in which you can take the drone with you. We always take the box with us, so that our drone is well protected in our backpack. The Fly More Combo is slightly more expensive, but we really recommend it. With 1 battery you can fly for almost half an hour, but that includes preparation and take off. If you often go to different places in one day and want to show different place from the air. Then you need at least 3 batteries to get the most out of your drone.

DJI Mavic Fly More Combo

Manually Set Your Drone – Tips To Get Beautiful & Smooth Shots

DJI remote controller

Sidenote before flying your drone

Before we will talk about your drone settings, we hope you know how to fly responsibly and safely. Would you like to know more about the rules and legislation regarding flying your drone? Then read our blog ‘3 Important Drone Rules to Know Before Flying a Drone‘.

Maximize the quality of your shots

The camera of the drone can be set to different quality settings. Make sure you film in the maximum mode: Full HD → 2.7K → 4K. The better the resolution, the sharper and more impressive your shots will be. 4K is 4 times as sharp as Full HD! Tip: Even if you export your video in Full HD, it is better to film your video in 4K. You will crop the footage in the post-processing, but a 4K recording contains a lot more information and will therefore look sharper than if you shoot your video in Full HD.

Please note: Make sure that you also set the highest quality when you switch to the photography mode. You often have to reset the quality settings in this mode.

Manually set your drone, maximizing quality

Manually set your drone to film

Decide the ideal flight mode

Most drones have 3 flight modes:

  • C-mode (CineSmooth): In C-mode, the drone will fly slowly and more controllably. This way you can make the shots as smooth as possible. So this is the best mode if you want to take a close shot of an object at low speed or when you fly in an area with many obstacles, such as the forest or in a city where you have to be careful.
  • P-mode (Normal): The P-mode is the standard mode. You will use this mode most of the time. The speed increases so you get more movement in your shot, but the drone does have a controlled stability. This mode is perfect for landscapes and wide shots.
  • S-mode (Sport): The sport mode provides an extra fast drone. With the DJI Mavic Mini we can fly 47 kilometers per hour. This mode is useful if it is windy, if you are far away from your subject and you want to have enough movement in your shot or if you want to track a fast subject such as a car or animals.

Manually set your drone for smooth slow motion shots

You can use slow motion when filming an action where you want to show more details of the action. If you want to slow down the shots, you have to set your drone to 60fps with shutter speed 1/120 or 120fps with shutter speed 1/240 for even more slow motion. In post-processing you can easily slow down the shots with these settings. In Adobe Premiere Pro this is how you slow down your shots: Create a timeline with the setting 24fps. Put the shots in the timeline and slow down the speed of the shots by clicking ‘speed / duration’ in the menu and enter the percentage you want the shots to be slowed down. At 60fps you can set the maximum speed to 40% and 120fps to 20% of its original speed.

Manually set your drone to photograph

Shutter speed

First of all, make sure that the shutter speed is as fast as possible, at least 1/160. Slower shutter speeds can cause movement in your photo. Because the drone gets constant gusts of wind and is not 100% stable, a fast shutter speed is definitely a must when shooting.

ISO

It is important to keep the ISO value as low as possible to get as little noise as possible in your photo. Also your photo will not get overexposed.

Aperture

With some drones it is also possible to chose an aperture, then it is possible to create a smaller depth of field and take brighter photos.

How to get the perfect cinematic look?

The best thing is to create a cinematic look for your shots. Cinematic means that your shots look real and natural and are stable and smooth without stuttering. At 24 fps (frames per second) you get the most cinematic look. But if you use 24 fps, you must double the shutter speed to 1/50. This setting is not possible on a sunny day, because your shots will be overexposed. So in this case you need a shutter speed of 1/200. But a faster shutter speed will stutter your shot and it will not look cinematic at all. In this situation a ND filter can be very useful. With a ND-filter you put a kind of mini sunglasses on the lens of your drone, so that you can correct and slow down the shutter speed to 1/50. A ND-filter will often have 1 to 4 stops. Every ‘stop’ is a doubling or halving in the exposure of your shot. On a sunny day we use ND32 (5 stops) and on a cloudy day we usually use an ND4 or 8. We use the ND-filter set from Sunnylife ND filter and we are very satisfied with the results. You can easily click the filters on the lens of your drone and vary in strength.

en_USEN
Search